Friday, August 22, 2014
Japan Order Just Arrived!
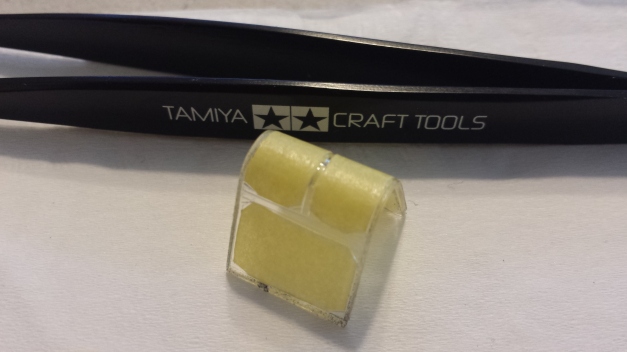
I ordered tools and a kit from HLJ last month. This was my test buy, to see how much the custom charge would be. I only paid P50 (US$1+) for this package and it was delivered to my house! Safe to say, this test was a success. I was worried though because the package arrived in the Philippines two weeks ago and was statused as "Retention". From what I had read that meant it was held in customs. I visited the post office three times to check if it had arrived in my city already, but it hadn't on all visits. On my third visit though, I discovered something interesting. I saw about 4 HLJ boxes in the mail room. I wanted to find out who owned those boxes so I told the person incharge if she could double check the boxes if maybe one of them was mine and she said, "No, sorry none of them are yours." without looking at them. That hinted that she knew who owned those boxes so I chatted with her some more. So then, I found out that there were a lot of plastic modelers in my area that ordered from HLJ too. What's even more interesting is, they regularly order from HLJ and every month there are always packages from the online shop. The person in-charge also knew that the packages contained hobby kits and she said that normally you'd only pay P50 (US$1+) for the package.
I'm going to do another test buy and this time I'll get more than one kit and a total package cost that is more than P2000.00 (US$50). I've read that P2000.00 is the maximum package value before customs tax applies.
By the way, I used EMS on this order. SAL is still too risky for a test buy right now. I'll try it once I get more familiar with the post office in my area :)
Tuesday, August 5, 2014
Last Year's GBWC Winners
Just about 2 months left before the Philippine qualifier for the GBWC 2014 begins, a few of the modelers that I admire are joining and its truly exciting to wait and see what they have in store for this year. Now while you think about joining (although probably late, if you haven't started...like me!), let's take a look at the level of skill and creativity last year's champions are.
To start off let's look at the American/Canada champion:
This beast is the creation of kdash71. It's named "MG Blitz Gundam Custom-Dash's Legendary Mobile Suit PWS-02"
Here's some more pictures of this amazing build:
Off to the next country, Philippines:
This was modelled by Michael T. Costa. This is another beast! It's just amazing how these guys can come up with unique and intricate designs!
Here's some more pictures:
Then finally we have the Japan champion and was also the world champion of GBWC 2013:
This masterpiece was built by: Shunpei Yamaguchi
Yes it doesn't look like the beasts from the other countries, but check out the pictures below! It's incredibly well detailed!
Yes it doesn't look like the beasts from the other countries, but check out the pictures below! It's incredibly well detailed!
You can check out the other GBWC 2013 regional winners here: GBWC 2013 Regional Winners
Hopefully next week I'll have an update on my B-17! I've completed the paint I needed but, I've been busy lately.
Friday, July 18, 2014
2014 GUNPLA BUILDERS WORLD CUP (GBWC)
Just last May was the 2014 Gundam Model Kit Contest, I had wanted to join but I felt I was too new to the hobby to participate in the contest. If I were to join a Gundam contest, I want to be atleast competitive enough to win an award :) (Yeah that's the goal!).
Now, Bankee (authorized distributor of Gundam kits here in the Philippines) just released the mechanics of a new competition: 2014 Gunpla Builders World Cup (GBWC). This is a yearly competition that started in 2011. I was thinking about joining this one but, I can't because of my busy schedule this year. And it got even more hectic (for the better) when my dad got back from the US and brought home something awesome! What it is...is for another post! :) I'm still trying to figure it out so for now, let's leave it as a mystery, hehe!
But, really if I felt I couldn't compete with a national event, how much more for an international one, right? That customized Gundam Nu on the picture was done by the 2013 GBWC Champion. It looks amazing! I don't believe I can build one like that yet. But maybe on the next nationals, I'll be ready :)
Here's a link to the mechanics (at least for the Philippines): 2014 GBWC Mechanics
Saturday, July 12, 2014
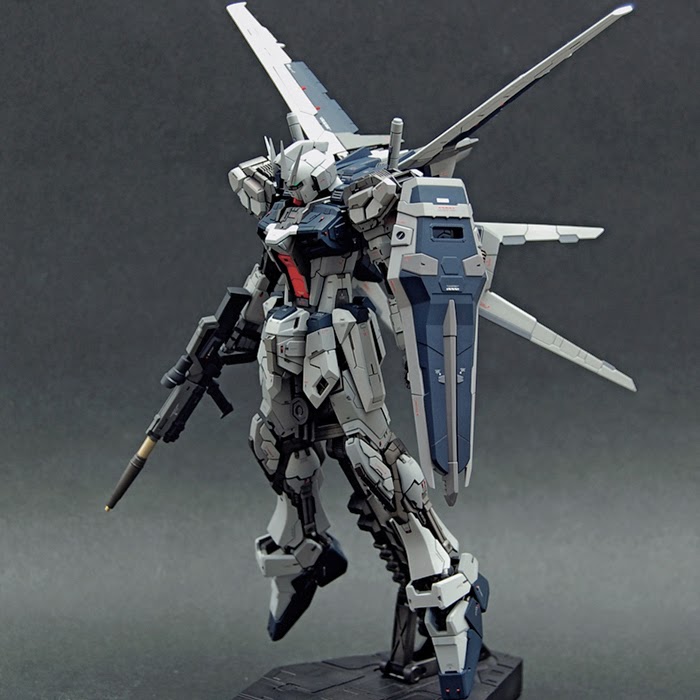
Strike Azzuro by Shunneige

While I learn and experiment on the different ways to customize a Gundam kit, I want to share with you guys the amazing customized kits I've found on the web. This is my first post to feature someone else's work, and this is just amazing!
This is a customized RG Aile Strike Gundam by Shunneige (his blog). I don't have an RG Aile Strike yet, so when I first saw this, I only noticed the color scheme. I figured that if this is an RG, the details are already assumed. But, I was so wrong. Here's a picture comparison he had on his blog:
It's incredible! I can only dream of getting this much detail on my kits. I have one RG kit so far and I never thought you can get an RG any more defined than what it already has. In fact, I was planning on using my RG Destiny as basis for the amount of panel lines I was going to make on my MG kits. Just show how new I am in this hobby :)
A final pic to show how amazing Shun's work is:
Check out his picture album for more pictures of this amazing work: Shunneige's Strike Azzurro Album
Sunday, June 29, 2014
Snap Build while Waiting
 |
| Build Strike Full Package and Gundam Deathscythe EW |
But I have not stopped building! I have been snap building two gundam kits to fuel my eagerness to build plastic models. You may have noticed that my Deathscythe lacks its weapon, sadly, I broke it while playing with my son. He got too excited swinging it around that it hit another toy and broke it into two. I've tried to glue it back together but it kept on falling apart. Decided to just ask for a replacement from Bandai, hopefully they will accommodate me. No decals on any of the kits yet, I plan on painting them so I'll reserve the decals till then.
Hopefully, I have my paints soon! Thanks for reading!
Sunday, June 8, 2014
GUNDAM.INFO Mid Year Campaign 2014
It's this time of the year again to hope to win on this awesome campaign! While winning is a long shot, its worth the try because the prizes are awesome!
For more info about the event visit: GUNDAM.INFO Mid Year Campaign 2014
Take a look at what's in store for the lucky winners!
For more info about the event visit: GUNDAM.INFO Mid Year Campaign 2014
Take a look at what's in store for the lucky winners!
Wednesday, May 21, 2014
1/72 B-17F Flying Fortress "Mempis Belle"
The famous B-17F "Memphis Belle". I'm really excited to get started on this kit as "Memphis Belle" the movie was one great show. I probably should try and watch the movie again to get some ideas on how I will weather this. If I can get the courage to do so that is. :)
To start, let me list down the paints I will be using since there's a lot:
- Black
- Chromate Green
- Yellow
- Khaki
- Tan
- Silver
- Steel
- Gunmetal
- Flat Black
- Olive Drab
- Medium Green
- Neutral Gray
The instruction manual seems easy enough to assemble so I'll hold on the updates, till I get the paint.
Tuesday, May 6, 2014
1/100 MG Gundam Astray Red Frame Ver. Ka
Took a break this week and snap-fitted one of my favorite Gundam kit, "Gundam Astray Red Frame". I love the whole design. The Gerbera Straight and Tiger Pierce katanas just looks awesome with the kit. The kit overall is very flexible and is very easy to pose. The Tactical Arm can be transformed into different forms like a ranged weapon, sword and flight unit. It's too heavy to hold without a stand but it can substitute as a stand to help you hold those difficult poses:)
No decals or paint yet. I plan to revisit this kit sometime in the future. Here are some pictures of my ARF:
 |
 |
Saturday, May 3, 2014
1/100 MG Bandai Build Strike Gundam Full Package GAT-X1058/FP
Sale at the toy store! I was able to get a good discount so I bought Sei Iori's custom Gundam. I'll add this to the queue and hopefully work on this before June. Update you guys soon!
Tuesday, April 22, 2014
1/48 T-6G Texan by Revell
I've been slowly building this kit for more than a month now. After having built 2 Gundam kits, this kit by Revell doesn't compare to the manufacturing quality of the latter. Still, I'm very excited to build this kit as it will be my first airplane kit! I made a minor mistake on this though as I had glued parts the wheel the wrong way, but the kit is very easy to build. I just didn't pay much attention to the manual when I assembled the wheels.
I managed to fix the left wheel. The right wheel parts were glued tight, I couldn't pull them apart.[/caption]
I managed to fix one of the wheels but, I had to remove the paint on both as I had scratched a lot of the paint off when I was trying to pull them apart. I had already painted the inner cockpit and some parts of the plane. I got too excited to start painting! Too excited that I primed the wings before attaching it to the fuselage!
 |
| ONLY WING AND FRONT HOOD PRIMED! Clearly, I planned this well! LOL! |
The result was not impressive but is good enough for me. At this stage, I really can't be too demanding to myself :)
After some more research, I found a less stressful technique. I simply cut thin strips of masking tape and line them across the main frames of the canopy edges covering even the corners. Then I used my hobby knife to cut the round corners. Next, I cover the center portions with liquid masking film. Here's a picture of the masked canopy:
Here are some pictures after panel lining and after applying the primary color:
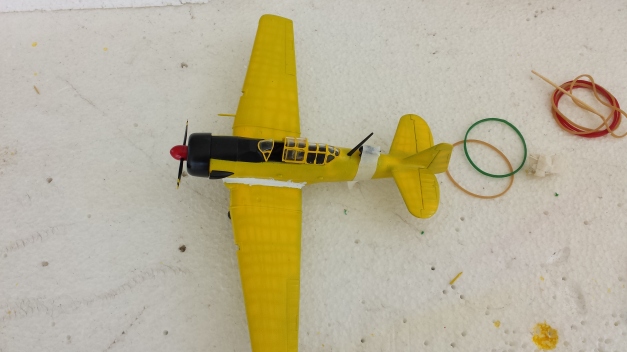
After applying a few coats, I became worried that using Black as panel lining for a yellow coat was a bad idea. This photo was taken after 5 yellow coats. In the end, I was able to lighten the black lines but the effect made a greenish color. I will probably use brown or dark gray next time.
Now I'm almost done! But not without some major blunders! I now have the wing attached and there's a very visible gap between it and the fuselage!
I used liquid eraser to fill the gap, but after sanding the fill it cracked :( I hope when I apply primer, it will make the cracks less visible. Another problem that I can't correct is with the canopy, I used thin cement to attach one part of the canopy on top itself and now there's a rough fog inside. I forgot that the thin cement acts very similar to a paint wash. When I applied it, it ran across the canopy windows.
From the picture, it doesn't look as bad as my disappointment with my work but it really looks horrible up close.
Here are some photos of my completed T-6G Texan:
Labels:
1/48,
1/48 T-6G Texan,
Airplane kit,
Build It,
Canopy,
Revell,
T-6G,
Texan
Subscribe to:
Posts (Atom)


