I've been slowly building this kit for more than a month now. After having built 2 Gundam kits, this kit by Revell doesn't compare to the manufacturing quality of the latter. Still, I'm very excited to build this kit as it will be my first airplane kit! I made a minor mistake on this though as I had glued parts the wheel the wrong way, but the kit is very easy to build. I just didn't pay much attention to the manual when I assembled the wheels.
I managed to fix the left wheel. The right wheel parts were glued tight, I couldn't pull them apart.[/caption]
I managed to fix one of the wheels but, I had to remove the paint on both as I had scratched a lot of the paint off when I was trying to pull them apart. I had already painted the inner cockpit and some parts of the plane. I got too excited to start painting! Too excited that I primed the wings before attaching it to the fuselage!
 |
| ONLY WING AND FRONT HOOD PRIMED! Clearly, I planned this well! LOL! |
The result was not impressive but is good enough for me. At this stage, I really can't be too demanding to myself :)
After some more research, I found a less stressful technique. I simply cut thin strips of masking tape and line them across the main frames of the canopy edges covering even the corners. Then I used my hobby knife to cut the round corners. Next, I cover the center portions with liquid masking film. Here's a picture of the masked canopy:
Here are some pictures after panel lining and after applying the primary color:
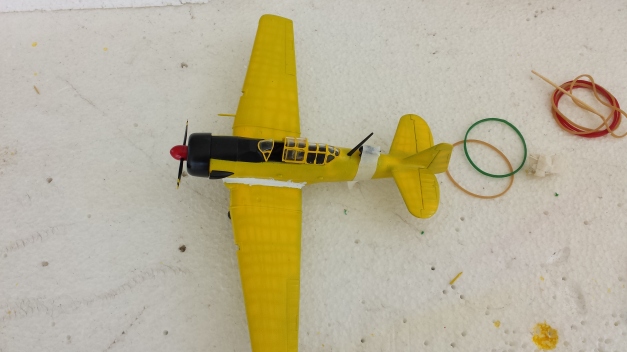
After applying a few coats, I became worried that using Black as panel lining for a yellow coat was a bad idea. This photo was taken after 5 yellow coats. In the end, I was able to lighten the black lines but the effect made a greenish color. I will probably use brown or dark gray next time.
Now I'm almost done! But not without some major blunders! I now have the wing attached and there's a very visible gap between it and the fuselage!
I used liquid eraser to fill the gap, but after sanding the fill it cracked :( I hope when I apply primer, it will make the cracks less visible. Another problem that I can't correct is with the canopy, I used thin cement to attach one part of the canopy on top itself and now there's a rough fog inside. I forgot that the thin cement acts very similar to a paint wash. When I applied it, it ran across the canopy windows.
From the picture, it doesn't look as bad as my disappointment with my work but it really looks horrible up close.
Here are some photos of my completed T-6G Texan:


